Wednesday, January 30, 2013

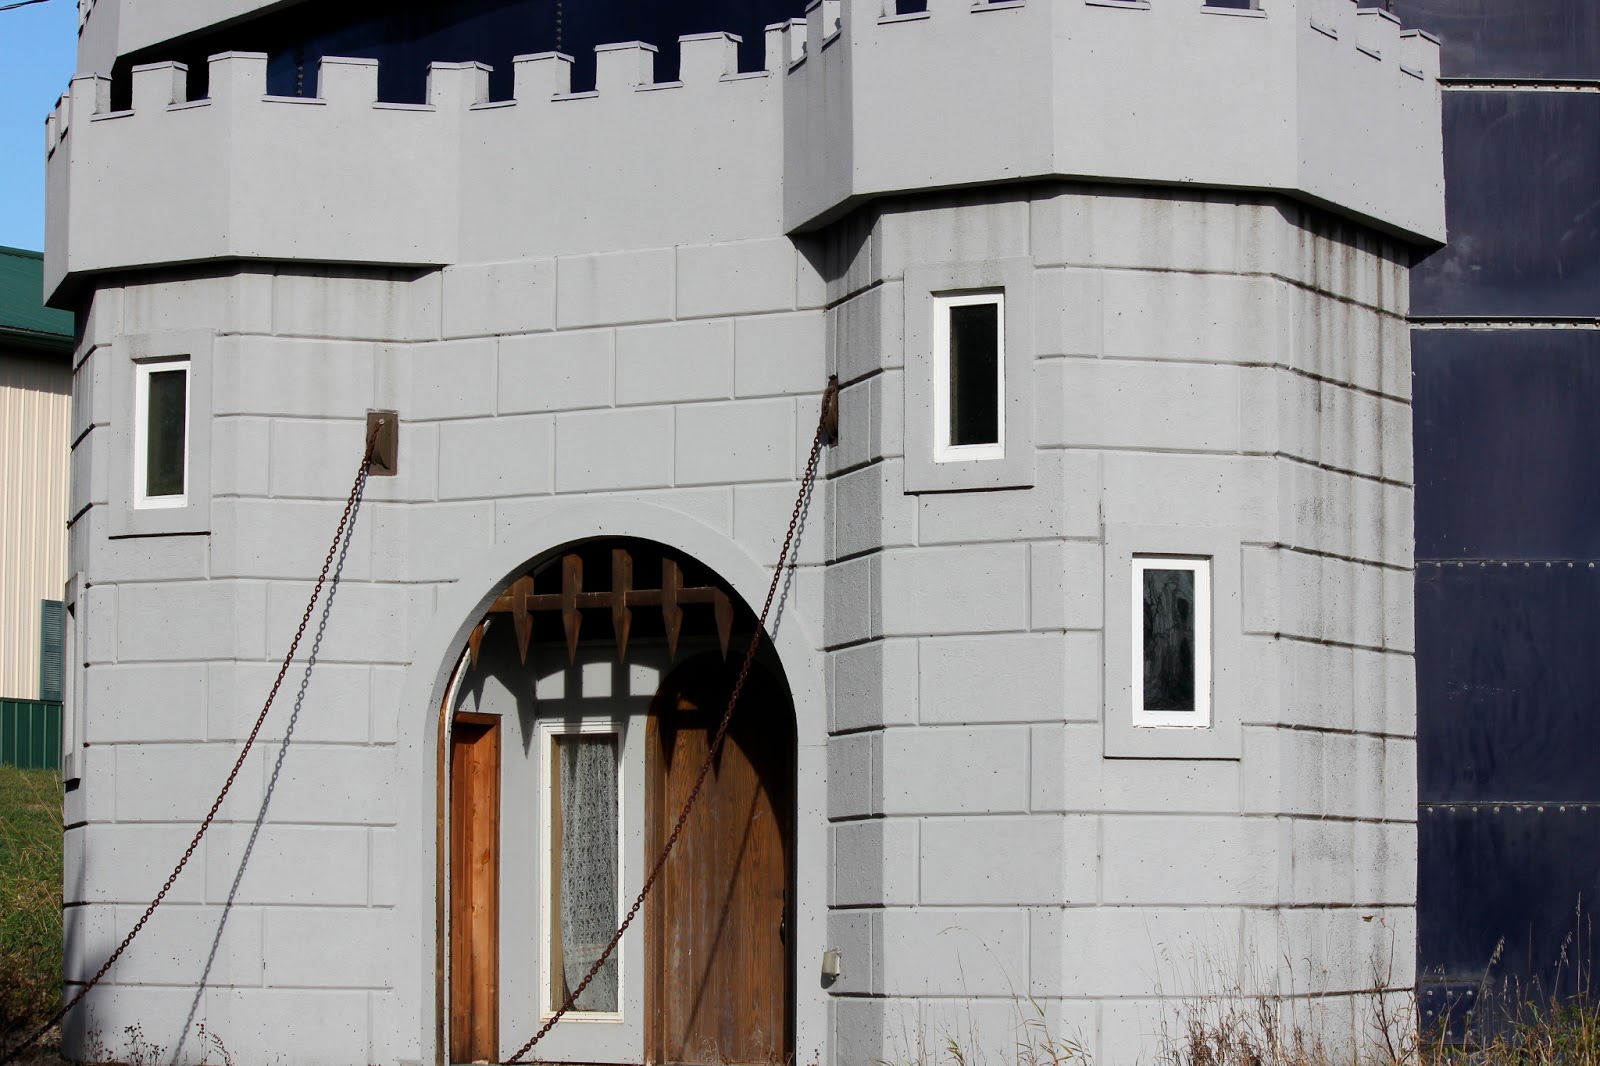
Castle Arkdale

Every single person in the world has a story.  When you look at someone you can't tell what they have done.  You can't tell where they have been or what joys or struggles they have lived through.  The same is true with the landscape.  You never know what lies beyond that long driveway or behind those large trees.  It is amazing what discoveries you can make by just listening to conversations and asking questions.  We discovered Castle Arkdale this way.  They don't advertise and don't have a sign, but at the end of a long driveway in Green Lake County Wisconsin is this most amazing bookstore.  It has over a million books.  We were looking for a certain book and someone mentioned that they may have it 'down the road'.  Down the road, where could that be.  The people that told us about it made a phone call and before we knew it we were entering into this amazing place.

Just down the road from this Green Lake County Park is Castle Arkdale.


 Castle Arkdale

 W1778 County Road K
 Markesan, WI 53946
It is recommended to call ahead to see if they are open.
(920) 398-3375 


These photos from inside the building were obtained from
+http://thisweekinbookhunting.blogspot.com/2010/06/castle-arkady.html


Apparently many years ago Lenore and Lloyd Dickmann began collecting books.   Lenore once taught at the UW-Oshkosh and later sold her books out of a schoolhouse in Markesan Wisconsin.  She needed more room for all of her books so her husband created a beautiful bookstore from a slurry tank.   I won't repeat the story because Bill Geist and CBS Sunday Morning did a piece on it.  Lenore and Lloyd are getting up in age and we don't know how long they will be able to operate this amazing place or what will happen to all their books.  Hopefully someone will be able to continue this hidden treasure.

Here is the youtube link.  http://youtu.be/EDAtNgjTRgM


Tuesday, January 29, 2013

Cabbage Rolls for Dinner

We had a strange couple days in Wisconsin.  Weather wise that is.  In the last twenty four hours we have had sleet, snow, thunder, lightning, thick fog, flooding with unseasonable warm temperatures and tonight we could get seven inches of snow with temperatures falling into the single digits.  I wish it would make up it's mind. 

Because I was home and had time to cook a little today, I'm posting what we are having for supper tonight.  It seems that Tuesday is turning into recipe day on my blog.  I made Cabbage Rolls.  I have been making this recipe for a long time.  The first time I made them was almost forty five years ago.  I was a newlywed and wanted to impress my husband.  Little did I know that I set a prescient that I could cook and I have been doing it ever since.  I always make extra and freeze some for a later meal.

Cabbage Rolls

1 medium cabbage
1 pound ground beef
3/4 cup milk
1/2 cup precooked rice (either dry minute rice or cooked rice)
1/4 cup chopped onion
1 teaspoon salt
1 can of tomato sauce
1/3 cup of water

Remove the core and outer leaves of the cabbage and cook in boiling water for about 8 minutes.
I usually just put it in the microwave until the leaves peel off easily.  Do not overcook because the leaves will fall apart when you start to assemble them.

Meanwhile combine raw ground beef, milk, rice, onion, salt and 1/4 cup of tomato sauce.  Mix this well.

Take one cabbage leaf at a time, lay it flat and put in a generous spoonful of filling.  Fold the leaf around the filling to make a little package.

I know these look a little bit like chicken thighs, but they really are the ground beef and rice mixture wrapped around a cabbage leaf.

Then I arrange these in a single layer in a baking pan or electric fry pan, combine the water and the remaining tomato sauce and pour over the cabbage rolls.  Cover and bake for and hour at 350 degrees.  Uncover for the last ten minutes.  This is the original recipe.

I experimented today with the pressure cooker for these.   I used the pressure cooker for the whole thing.  I made the rice which took 5 minutes, then cooked the cabbage (the microwave works better though) for 5 minutes and after I assembled the rolls, I pressured them for 20 minutes.  Total time 30 minutes.
I prefer them baked or cooked in the electric fry pan.  They are firmer and some of the excess moisture evaporates. 


While the cabbage rolls were cooking, I peeled some apples and cut into pieces.  I cooked them with a little water until they were soft, mashed them a little with a potato masher, added some sugar and we had fresh warm chunky applesauce also.  Now I have to clean up the kitchen, it's always the worse part. 

Monday, January 28, 2013

Snowman Decoration

Before spring arrives, I wanted to share a little snowman decoration that I made.  Anyone that knows me will know that I don't like shopping in big stores and malls.  I just go blind and can't ever find what I am looking for.  Thrift stores are another story.  It is amazing to me what people give away.  The saying that one person's junk is another person's treasure is certainly true.  I looked for something that I could make.  I came across this pattern in a bin of patterns.  I figured if some poor little child in China can make this type of thing, then maybe I can too.   

I cut out the form and laminated it so I could use it over and over (if it turned out).  The pattern came in four sizes.  I found some white fabric and cut out two pieces in this shape.


 I embroidered the eyes, mouth and buttons out of black floss.  I made a little cone of orange fabric for the nose and sewed it on.  I then stuffed it with quilt batting and tied it with strong string around the waist and the neck.  It didn't sit quite right so I cut out a circle of cardboard the size of the bottom and covered it with more white fabric and attached it on the bottom.  The pattern called for a piece of fabric tied around the neck for a scarf and an old sock ribbing for the hat.  I decided to knit a hat, scarf and some little mittens.  I glued some sticks in the side for arms.  It may be a little tacky, but it cost almost nothing and I made it myself.


Sunday, January 27, 2013

Swiffer Sheets from Fleece Fabric

I have to admit, I saw this idea on another page.  It was either a Facebook post or another blog, but I have to blog about it also.  I remembered it was +Courtenay Creeklinehouse  I'm all for saving time and money.  I really like swiffers but you have to buy the refill sheets, throw them away each time and sometimes they just push the dirt around.  I have tried this idea using a washcloth but it didn't work as well.  So the post I read said to take some fabric like flannel or fleece and cut it to the size of the swiffer sheet.  I measured one and they are about 8 1/2 by 11, the size of a piece of paper.  Then I went down to my stash and looked around for something I could use.  Six years ago I needed to make some hats because I had lost my hair due to chemotherapy.  I bought too much so I had this leftover piece nicely folded just waiting for me to repurpose it.  It doesn't bring back good memories but it's fine and I'm fine now.

This isn't the thick fleece but the cheaper version.   I believe it probably worked even better than the thicker fleece.  The first one I cut had the stretch going along the long side.  The next piece I had the stretch on the narrow side.  I think I prefer the short side stretch, but it really doesn't make that much difference.  Since this fabric doesn't ravel there is no sewing necessary.  I made all the pieces out of the same color so I will know that they are designated as the Swiffer sweeper sheets.  Then it was time to try it out.  I ran it around on the hardwood floors.  It picked up stuff that I couldn't even see on my floor.  The static created by pushing it around attacked every piece of dust.  It was embarrassing how dirty my floor was.  When I was almost finished, I removed the fabric, flipped it over and used the other side.  Then I threw it in with a load of washing.  Be sure you have washable and dryable fabric and you will be set for a long time.

 This was the first attempt.  The sheet I cut was a little long but 8 1/2 by 11 will fit perfect.


Here I flipped it over.  You can see all the dirt on the inside.  I would highly recommend this project.  So I cut 14 sheets and then I will always have a clean one available. I will keep you posted as to how they hold up after repeated washings.


Saturday, January 26, 2013

Missoula Children's Theatre-The Secret Garden

Our granddaughter has been participating in the Missoula Children's Theatre for a few years.  Twice a year they come to Green Lake Wisconsin and audition children for a play.  Then for only one week they practice and at the end of that time put on the play at the Thrasher Opera House.  This year they did The Secret Garden.  It is a wonderful experience for everyone who is fortunate to get a part.  Today we attended the afternoon performance.  It was a good time and we were impressed at how quickly this group learned their lines and the songs.

 The Playbill from the show explains the story and some information on the Missoula Children's Theatre.


   Our granddaughter is the spider in the middle.  She had the chartreuse outfit with the orange dots.  She did a great job and had a wonderful time.


Friday, January 25, 2013

Putting a New Addition on a Log House


We hadn't lived in our house very long before we needed more room.  It seems these days everyone wants to downsize.  It happened to us twice.  Once when the kids went off to college and got married, we bought a smaller house.  We didn't realize that we actually needed more room to accommodate spouses and then grandchildren.  When we retired, the same thing happened.  We bought a smaller house.  Soon not only did we need room for spouses and more growing kids, we needed space to feed all these people.  We decided to build a dining room onto our house.  The challenge with a log home is that traditional construction doesn't work.  Fortunately, we found a local builder who had experience.  The first thing that happened was deciding on the size.  From that measurement,  the builder found the correct number of trees we would need in the proper diameter.  He located some trees in our area that had been cut down.  He hand stripped the bark off the trees and assembled the room off site.  It was put together like lincoln logs to achieve the proper size, then they disassembled it, marked it and brought it to our house.


 In the meantime, we had a basement dug.  We have completely sandy soil and seeing the hole dug was an experience in itself.  I was sure the equipment and the driver was going to end up in the hole.


 After the hole was dug, they began pouring the concrete floor.


Here they are setting forms for the concrete basement walls.


Next was setting the floor joists and the subfloor.


Starting the building process.  Putting the logs back together piece by piece.

Then the roof goes on.

They cut out for the windows with a chain saw.


The windows are installed.

Making the old and new match is a challenge.


It was exciting when the wall to the new room was opened up from the inside.
They cut that open with a chain saw also.

The finished room.  


 It looks like it was originally built this way.


Thursday, January 24, 2013

Eastern Bluebirds Can Stay All Winter in Wisconsin

You are never too old to learn.  I learned that the Eastern Bluebird will not migrate from Wisconsin if they are given the proper conditions, food and shelter.  The other day we took a trip to one of the big box stores.  We were shopping in the birdseed department and struck up a conversation with another couple.  They were buying dried meal worms and I asked them what birds they were feeding them to in the winter.  I feed my bluebirds meal worms but stop feeding as soon as fall approaches.  These people said they never stop feeding and their bluebirds stay all winter.  They said they have three males and two females feeding everyday.  Every year I can't wait for the middle of March to see the bluebirds return.  Who knew that they just lived up the road a few miles.  From now on I will provide food all year. 

These people also explained how they raise live meal worms.  I have done that in the past but gave up because it was too much work.  The method they use is very easy.  All it takes is a plastic container about 4 inches deep.  They get live worms, put them into the container, feed them oatmeal or cornmeal, let them go through the life cycle, take out the adult worms and start over again.  I may have to try this again.  As many of you know, I already have a red worm farm (see blog about Worm Farming-An Unusual Type of Farmer).  If I try raising meal worms, I will blog about it at a later time.

We have the bluebird houses close to our house so we can observe them easily.  Just beware of the House Wren.  Everyone thinks they are such nice little birds with a beautiful sound.  They are mean little devils that will fly into the bluebird house, pierce an egg and throw it on the ground.  I used to like the Wren but not any more.   I have observed their bad behavior in person.  Now we put wren guards over the birdhouse entry.  The bluebirds enter from the side and the wrens can't get in and out by going straight in.  It has been quite successful.


These are the first pair of bluebirds we attracted ten years ago.  Since then we have a couple of pair every year.  By now they are probably the great grandchildren of these two.  They usually have two and sometimes three broods a year.


The bluebird usually has 3-5 eggs.  They are light blue and the nest is made from pine straw and grasses.   The female laid one more egg in this nest before she began sitting on the eggs.   The color is a prettier light blue than this photo shows. 


Two baby bluebirds with their dad just after they fledged.  It looks like one of them is mouthing off.


This is the male bluebird that we had during the 2012 season.


Wednesday, January 23, 2013

Ground Cherries Are All I Can Grow

As I sit here near the end of January, thoughts of spring filter into my head.  I'm looking forward to warmer temperatures and opening up the house.  I realized that I'm not looking forward to planting a garden. It isn't fun anymore.  Our trees have gotten so big we have very few areas that have sun and  we have tried to amend our sandy soil for years but it still isn't very fertile.   I made a decision, I'm not planting any vegetables this year, not even tomatoes.  Between the farmer's markets, friends and family, I get more than enough vegetables and none of the work.  I am going to concentrate on flowers and native plants..  They may look a little messy and not manicured, but the bees and birds love it that way and we should too.  No fertilizer on the yard either.  If it burns up and turns brown as it did last year, then that's how it should be.  I feel so liberated.

For those of you who start seeds this time of year, I have a helpful hint for tomato plants.  If you have a favorite tomato and want to start some plants for the next season, all I do is put the seeds onto a sheet of newspaper.  I spread them out, put them away in a dry location and forget about them.  Although sometimes if the tomato is a hybrid, you may get a very different type.  When the time comes to start the seeds, just get out the newspaper and cut around the seeds.  A lot of seeds can fit on a small piece of newspaper and the drying process makes them stick to the paper.   Plant the seed stuck to the paper by whatever means you use.  I like to plant in a paper/cardboard egg carton.  I punch a hole in each of the twelve sections for drainage, fill each compartment with starting soil, put the piece of paper with the seed, cover with a little more soil and water.  Then when the seedlings are big enough, cut apart the egg carton and plant the whole thing.  No need to disturb the plant.

I do have ground cherries that come up by themselves every year. I have no idea why they grow so well and are so hardy.   I am going to let them take over the garden space this year.  Last year I made ground cherry jam and it was wonderful.

To make the jam, I started out with three cups of ground cherries taken out of their paper husks. It will be the middle of September before they are ready.  You wash them well and them put into a kettle with 1/4 cup lemon juice, 1/2 cup water and 1 box powdered pectin.

Bring them to a boil and when the ground cherries start to burst,  I put them into the blender with a two of overripe peaches.  There are a lot of seeds in ground cherries and the blending helps break down the seediness.  After they are blended, put them back into the kettle and return to a boil.  Then add three cups of sugar all at once and boil according to pectin package directions, usually 1-3 minutes.

Put in sterilized jars. Screw on lids and invert for 5 minutes then turn over and allow to cool until the  lids POP! That will mean the seal is tight.  I still store them in freezer and take out one jar at a time.
This recipe will make 3 medium jars or 6 small jars of jam.


Tuesday, January 22, 2013

Baked Cod for Supper

It was suggested to me that I should post a recipe on here now and then.  I know that recipes are easy to find online, so all I can do is post a meal that I have made.  I made this yesterday.  We usually go out for a Friday fish fry.  Fish fries are popular here is Wisconsin.  Almost every bar or restaurant has one.  I really don't like the deep fried version and it's not very healthy.  While talking to a cousin of mine, he shared with me how they make baked fish where he works.  It is so simple.  Here is the recipe along with what else we had for supper.  I really took it easy, but it tasted good.

Baked Cod

1 lb. of frozen cod fillets (Rogges Alaskan Cod are good and 80 calories for 4 oz.)
Olive oil
Seasoned salt

Thaw frozen fish in cold water and drain water.

Pat dry on a paper towel
Put some olive oil in the bottom of a baking dish
Layer fish fillets
More olive oil on the top of the fish
Sprinkle with seasoned salt

Then bake uncovered at 350 degrees for 20 minutes.
Do not overbake.

Fried Potatoes

This isn't rocket science either.  Fried potatoes can be made with left over boiled potatoes, frozen hash browns (I like the southern style squares instead of shredded) or cut up you own potatoes and cube or slice (these are called raw fries).

Just put some olive oil in a frying pan and fry until potatoes are brown.

Then I heated up a can of stewed tomatoes.   

Cost for the meal was $2.85 person.  The average cost for a fish fry is $7.98 and up per person.
The fish was $6.99 a pound and I had a little less than a pound for 3 people.
The hash browns were $1.99 for the whole bag and I used about half for 3 people.
One can of stewed tomatoes were $.69 and that also fed 3 people.


Monday, January 21, 2013

Technology May Not Be Progress

In previous posts I have mentioned my Dad.  He is 88 years old and lives with us.  Almost a year ago my Mom passed away and due to poor eyesight dad was unable to live alone.  He is an easy going man who never talked very much.  My mom was the mouthpiece for the family.  As time goes by, he is talking more and today he told me a story I hadn't heard before.

Kids used to play outside and entertain themselves.  They used to make things and build things to play with.  My Dad told how he had a friend who was interested in airplanes.  They would build airplanes and play with them.  He and his friend once took scrap lumber and made a plane that was eight feet long.  It had a big wing span.  They would sit in it and pretend to fly.  Much later my Dad was in the Army Air Corp (became the Air Force in 1947) in World War II and flew 44 missions.  He certainly had his fill of flying after that experience. 


At the same time they were building airplanes, Dad decided that he wanted to make a kite.  You couldn't afford to just go to the store and buy one.  He said he got some sticks and some brown wrapping paper.  He attached the sticks together and covered it with the paper.  He can't remember how he attached the paper to the sticks, but he must have done a good job.  Then he tied rags on the bottom for a tail.  He said it worked beautifully.  There was a big hill across the road from his grandma's house.  He would stand on the hill and fly the kite.  Sometimes he would stake it out and it would fly all night.  One time it flew for a week.  Then one time he was able to get a new kite from the store.  He put it together but it never flew as well as the ones he would make.

My daughter took away all technology for the weekend and my grandchildren didn't know what to do with themselves.   They call it progress but I think we have lost something in the process.  Kids and many adults have a hard entertaining themselves.


Sunday, January 20, 2013

Zote, What on Earth is Zote?

There are some disadvantages to living in the woods.  Even though we are technically living in the city, we don't have city sewer.  We have a septic tank and we have to be careful about putting too much water down the drain.  Therefore, I am not able to do several loads of laundry in one day.  I have to do one or two a day.  Today when doing some laundry I discovered that I am almost out of my laundry soap and fabric softener.

Most people these days are familiar with the homemade laundry detergent recipe.

Homemade Powder Laundry Detergent:

1 5.5 oz. Bar Shaved Soap (Fels Naptha or Ivory)

1 cup of Borax

1 cup of Arm & Hammer Washing Soda

Directions:

Stir the ingredients together (after shaving the soap) and use 2 TBS per load of laundry. This method should work well in HE front loader washers as well since it is a low-suds formula.


Instead of Fels Naptha soap I am trying a product called Zote.  It smells so good. It smells like clean fresh soap and not perfume. Zote only costs $1.19 for a 14.1 ounce bar and makes a double batch. Because it comes in a bar just as Fels does, it has to be ground up.  There are many methods to do this like a cheese grinder, knuckle buster or blender.   Zote is a softer soap than Fels or Ivory so I cut the bar up in pieces, put it outside (or in the freezer) to get cold and ground it up in the blender.  I hope I got all the soap smell out of the blender or we will be blowing bubbles from our next smoothie. 


I cut the bar of soap in pieces and then ground the soap up in the blender.
Then I added the Borax and Washing Soda and blended it again to make a fine powder.

Now the fun begins.  I took my newly made laundry soap down to the laundry room and put a load of clothes into the washer.  Then I scooped 1 tablespoon of the new detergent in.  I didn't use any fabric softener because I wanted to see how it was without it.  An hour later I went down to throw the load into the dryer.  Oh my gosh, there was water on the floor, under the laundry tub and it had seeped a little into an adjoining bathroom.  I thought my new soap must be a complete failure but I couldn't imagine why.  I dried everything out with towels and fans.  Then later (remember I can do two loads a day) I thought I would try it again only this time stay and watch.  I loaded the machine and put the soap into the dispenser, turned it on and waited and waited and waited.  Imagine how painful that was for someone with my personality.  Nothing went wrong.  The machine went through all the cycles perfectly.  The clothes had no residue and smelled good when they came out.  I don't know how well it cleaned because most of our laundry isn't dirty, it just need freshening up.  Who knows what had happened but it seems to have resolved itself.  Stay tuned, I will report if this soap turns out to be a failure but it looks and smells good so far.

Homemade Fabric Softener

Ingredients:
6 cups water
3 cups white vinegar
2 cups Suave Hair Conditioner (any inexpensive hair conditioner will do)

This recipe can also be cut in half because it make a lot.
Directions:
1. Mix water, vinegar, and hair conditioner in a 1 gallon container; stir. Do not shake it; it will cause foaming.
2. Use the same amount you normally use in a rinse cycle or spritz it on a wash cloth and throw in dryer.


Saturday, January 19, 2013

Celebration of Elvis's Birthday


Last year on January 6 we heard that Dan Sutter was doing an Elvis show at the Senior Center in Oregon Wisconsin.  It was in honor of Elvis's birthday.  We have known Dan for almost 20 years.  We took a little road trip and surprised him for the show.  It was wonderful and we enjoyed it very much.  This January he was doing it again, so we planned to attend.  For many reasons we weren't able to make it.  We were disappointed but that is how things go sometimes.  Imagine my surprise when two Cd's arrived in the mail yesterday.


I found this little youtube video someone did with a sample of last years show. 


If any of you have the opportunity to see or hear Dan sing you will be pleasantly surprised.  Dan sings and plays in a band called Universal Sound.  They play almost every weekend in the Madison Wisconsin area. 


Friday, January 18, 2013

A Day to Remember or to Forget

Well I guess all days living in this nice area with lots of privacy and wildlife isn't perfect.  No place is.  I had quite a day.

In the morning we usually have oatmeal for breakfast, except two days a week my husband makes eggs, bacon, hash browns and toast.  On this particular morning, I made oatmeal.  There is no need to cook oatmeal on the stove or buy instant oatmeal.  It cooks great in a microwave and you don't have a separate kettle to wash.  All you do is put in half as much oatmeal as water and microwave it for a minute or so depending on whether you have quick oats or old fashioned.  So I put in 1/4 cup of oatmeal, 1/2 cup water, a few raisins and some sugar in a bowl and set it in the microwave.  I set it for 1 minute 15 seconds.  Then while that was cooking I cut a piece of bread and put it in the toaster.  When the oatmeal is done so is the toast.  I pour a little pitcher of milk, put some cinnamon on the oatmeal and take it to my dad.  This time when the microwave beeped and I opened the door,  the oatmeal wasn't done.  I tried again and realized that although everything on the microwave was working (timer, light, fan, turntable), the food wasn't cooking.  The microwave is less than two years old and it's broken.

The next thing I do in the morning is go out and retrieve the SD card from the trail camera and replace it with another.  I did this as usual and came in to look at the photos.  The card reader didn't work.  Card readers are such a convenient way of loading photos onto a computer, but not today.

The next thing to happen was my camera.  I always have my camera handy in case I see something of interest either in the house or outside.  My husband spotted either a fox or coyote running across the marsh.  I grabbed the camera and didn't get there in time, but noticed my LCD screen was not lighting up.  I took the battery out and charged it.  This camera has a rechargeable battery and it lasts a very long time between charges.  I put the fully charged battery in the camera and it still didn't work.  I emailed Canon and they gave me a solution.  I tried and it drained the battery.  At that point Canon told me I had to send the camera in.  Now I don't know what to do.  I may buy a new battery to see if that is the problem or else I have to send it in.  My camera is a very good camera and this makes me mad.  It is still under warranty so I guess that is what I need to do.

This is not a good day, but then I discovered the problem.  I was finally able to see the photos on the trail camera and this is what I found.   The Headless Countess Wannabe has struck again (see Critters of the Night blog) and this time she is wearing a gray wig and has stolen my turquoise ring.  She is eating well too.  Look at that double chin.  And her pants don't even match.  She looks a bit like Queen Elizabeth but I'm sure she wouldn't be traveling incognito in Wisconsin in the winter.  Hopefully soon the stars will align and everything will get back to normal.


I can only guess what she is pouring into that dish.  Yuck!